Happy National Biscuit Day!

It’s the 29th May which means two things. Firstly, it’s our new intern, Gina’s birthday. Secondly, and much more importantly, it’s national biscuit day, which is a pretty big deal as far as these national days go. Inevitably, Gina will be expecting some kind of gift from her esteemed colleagues, allowing us to bring vast quantities of biccies in to the office under the guise of celebratory niceties – result! If you’re up for joining in the biscuity festivities, we’ve left a few of our fave recipes below. Enjoy!


Gluten Free Jaffa Cake

Is it a cake or is it a biscuit? Who cares when they taste this bloomin’ marvellous!

Ingredients

For the base

* 75g gluten-free flour

* 50g ground almonds

* 1/2 tsp baking powder

* 1/4 tsp salt

* 3 tbsp coconut oil, melted

* 3 tbsp maple syrup

* 4 tbsp milk of choice

For the orange layer

* 1/2 cup (120ml) orange juice

* 1 tbsp maple syrup

* 1 tbsp orange zest

* 1/2 tsp agar agar

For the chocolate topping

* 100g-150g dairy-free dark chocolate, melted and left to cool


Method

1. Preheat your oven to 180*C (160*C fan assisted)/ 350*F

2. In a large bowl, mix together the flour, ground almonds, baking powder and salt.

3. Pour in the coconut oil, maple and milk. Mix to combine.

4. Lightly oil a muffin tray and transfer about 1.5-2 tbsp of the batter into each of the muffin tray cups.

5. Bake for 10 minutes. Leave to cool completely.

To make the orange jelly

1. Add all the jelly ingredients into a small saucepan and cook on a medium/high heat mixing continuously until it starts to boil.

2. Take off the heat, pour into a wide bowl and leave to cool.

3. Once the jelly has cooled down, transfer into the fridge to speed up the setting process.

To assemble

1. Cut out rings from the jelly, smaller than the width of the base.

2. Top each base with a jelly ring (or a small tsp of marmalade if you don’t want to make the jelly), then drizzle some melted chocolate on top. I find if u leave the chocolate to cool once melted it’s a lot easier to control drizzling the chocolate on top.

3. Transfer to the fridge and leave for about 15 minutes until the chocolate has set


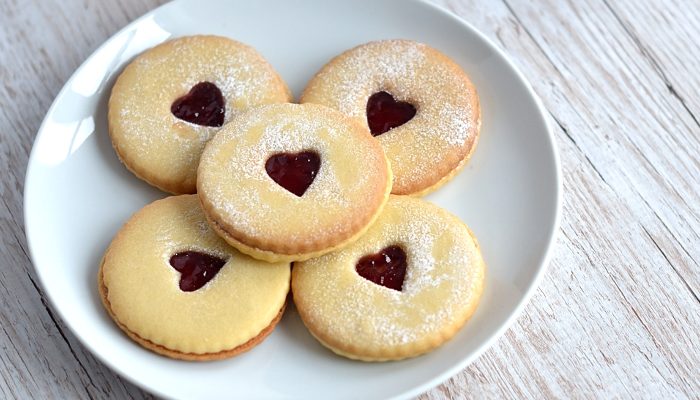
Gluten Free Jammy Dodgers

This great recipe for these jammy treats was crafted by our pals over at The Coeliac Sanctuary. Well worth a go!


Ingredients

* 350g gluten free plain flour

* 1tsp bicarbinate of soda

* Pinch salt

* 140g sunflower spread

* 100g caster sugar

* 2tbsp maple syrup

* 1tsp vanilla extract

* 1/2tbsp soya milk (or almond or coconut would work)

* Stawberry Jam (about 1/2tbsp per biscuit)

* Icing Sugar, for dusting


Method

1. Mix together flour, bicarb and salt. In another bowl cream, spread, sugar, maple syrup and vanilla extract.

2. Mix the flour mix into the butter mix. Once semi combined, mix together with your hands until you get a rollable dough, if the mix is too crumbly add the milk, otherwise it can be left out.

3. Roll out the dough, cut out 3 inch rounds (28 of them) and use a small icing cutter or knife to cut rounds out of the middle of half the rounds (these will become the tops).

4. Bake for 10-12 mins on gas mark 4 until cooked but not brown, allow to cool and put jam on the bottoms, top with one of the biscuit tops and sprinkle over icing sugar.


Gluten Free Party Rings

These colourful little goodies featured heavily in many-a-childhood across the UK – this incredible recipe from Gluten Free Cuppa Tea will ensure the fun continues well into adulthood…


Ingredients

* 200g gluten free plain flour

* 1/4 tsp xanthan gum

* 100g caster sugar

* 100g dairy free hard margarine (I use Stork Baking Block)

* 1 egg, beaten

* 1 tsp vanilla extract

* 300g icing sugar (to mix with boiling water)

* Selection of food colouring pastes (I used Dr Oetker yellow, pink and purple food colour gel)


Method

1. Preheat oven to 180C.

2. In a large bowl measure out your dry ingredients (gluten free flour, xanthan gum and sugar), mix.

3. Cube your dairy free hard margarine and rub it into your dry ingredients until it resembles breadcrumbs.

4. Stir in your egg and vanilla extract. Keep stiring till it it starts to come together into more of a dough.

5. Use your hands to bring it into a ball of dough. If it’s sticky, just add a little extra gluten free flour until it’s a nice, firm dough. Wrap it in clingfilm and leave to chill in the fridge for at least 30 minutes.

6. Remove your dough from the fridge and roll it out on a well floured surface with a well floured rolling pin too. I roll mine out to about the thickness of a pound coin, a little thicker or thinner won’t matter though either.

7. Using a circular cutter, cut out the party ring shapes, then using a smaller circular cutter, cut out the centre circles and remove them. (You can use this to roll out more party rings if you have extra dough left over)

8. Transfer your party rings to a baking sheet and bake for about 10-12 minutes until slightly golden. (12 minutes is perfect in my oven)

9. Transfer to a cooling rack to cool completely.

10. To make the icing, sieve your icing sugar into a bowl and a little boiling water, 1 tsp at a time. Mixing either by hand or with a mixer until it’s a smooth and thick enough but still drizzles off the spoon. You don’t want it to be runny!

11. Once you are happy with the consistency of your icing, divide it into 3 separate bowls and use your food colouring gel to colour each (yellow, pink and purple).

12. Dip your biscuits face down into your yellow, pink or purple icing so they are fully covered on top. Let any excess drizzle off. Leave it to set slightly for 2-3 minutes.

13. Place a little yellow or pink icing into a piping bag and using a small nozzle, carefully draw lines of icing on top of a different colour icing (so yellow on purple icing for instance)

14. Using a cocktail stick, feather the icing.

15. Put to one side on a cooling rack so the icing can fully set. Excess icing should be able to drip off.

16. Enjoy!

London’s Best Picnic Spots!

The scorching weather last week really brought out the worst in the Too Good To Be staff. There were fights over the seats with optimal sun, squabbles over placement of the one office fan that still works, and friendships ruined over the distribution of the limited number of ice cube trays. While all this was going on behind us, we felt it was up to the social media team to uphold the values of this fine brand and produce something of real importance to our customers. In the end we settled on offering up a few of our favourite London picnic spots, along with the ideal goodies to bring along for the ride…

North
Primrose Hill

Primrose hill is an exceptionally beautiful spot of land around 5 minutes walk from Camden Town. The hill boasts stunning, unobstructed views of the London skyline, making for the perfect spot to settle down with a top notch picnic in the sunshine. For this particular spot we’d recommend stocking up on a decent number of our sausage rolls – the ideal snack-on-the-go should you get peckish half way up the hill…

South
Greenwich Park

Another space with a skyline view – not quite as good as Primmy Hill (in our humble opinion) – but beautiful nonetheless. This patch offers enough seating to bring along some of the less-portable products in the TGTB range, providing your paper plates are up to the task. Why not rock up with a selection of quiche i.e. our Quiche Lorraine and our Quiche with Cheese & Caramelised Onion. P.S. while you’re in the area do check out the Greenwich Meridian!

East
Victoria Park

Now we head out to the East-end and and its abundance of fabulous green spaces. It was a tough choice, but if there’s anywhere that’ll offer up those summery vibes atop a picnic blanket it’s Victoria Park in Tower Hamlets. We’re not 100% sure why, but we feel that east end parks attract more of a pork pie vibe than anything else – so that’s what we’re going to go with for this particular spot. Why not pop over to the Royal Inn on The Park for cheeky wine as the sun starts to set…

West
Richmond Park

One of London’s biggest, best and arguably most serene bits of parkland – weighing in at a whopping 2500 acres. The spot is perhaps best known for its 650 deer roaming freely across the park, offering truly remarkable views as the herd gather on the outskirts of the park’s woodland. We’d suggest rocking up with a couple of tarts – the chocolate and lemon variety of course! These tasty treats will be gobbled in no time at all, limiting your chances of any hassle from those hungry deer…

Where next for our #PerfectPicnic series? Let us know over on our social channels! @TooGoodToBeUK and if you like the sound of the goodies we mentioned, pop over to our shop and fill up yo’ basket!

Coeliac Spotlight – The Coeliac Sloth

A few weeks ago we put out a request on Twitter for participants in the next edition of the Coeliac Spotlight. Out of all the responses there was one who stood out in particular for their fabulously named blog. We were a little unsure as to the reason for the name and our nosiness getting the better of us we decided to invite her for a little chinwag. Please give a warm welcome to the Coeliac Sloth…

Right Georgina, let’s get straight to it…how long since your diagnosis?

I was diagnosed in 2015, at 23 years old, after having various nutritional deficiencies, bowel problems, and the fatigue and low mood. I’d had those symptoms since I was 19, but It took my doctor until January 2015 to test for Coeliac Disease.

Have you noticed much of a change in availability over these past two years?

One thing I have noticed since diagnosis, is that the availability of gluten-free food when you eat out has increased dramatically from things like meal deals, to going to a Coeliac UK accredited restaurant. I don’t have to rely on jacket potatoes and salads! I also feel like Coeliac Awareness week is fantastic for helping people understand. With social media, advertisements, TV shows, and Magazines talking about it, it really helped my mum understand what Coeliac Disease was.

It’s great isn’t it?! Now, every coeliac goes through a nightmare dining experience at some point in their life. Had any awful ones yet?

My worst dining experience as a coeliac was when I was out with my best friend, shopping. We decided to go to a cafe that does pizza and chips and have a look before we decided (I know, bad idea). In my head, I was thinking that the chips would be safe and fried in a separate fryer, as pizza and chips were the only things on the menu. I went up to the counter and asked them if they were fried separately, explained that I had coeliac disease, and I couldn’t eat gluten. They asked the chef to come out, which he did, and he asked me what gluten was. I was there for 10 minutes explaining what gluten was to him, by this time there were 2 chefs, and 3 members of staff, with a lengthy queue behind me. And then they told me they had an allergy sheet, and after reading it, they told me the chips were gluten free. I repeated my first question about the chips being fried in the separate fryer and they told me that they were. I was so tired at this point I just took them and sat down with my friend, then they all stood around the counter watching me, it was so uncomfortable!

Wow. That sounds like an experience. How about a place where you’ve had a particularly good experience? We’re guessing it wont be the restaurant you’ve just mentioned…

My favourite restaurant for Gluten Free Food is Chiquitos. They got their CUK Accreditation this year, and their staff are always so friendly and accommodating, and the atmosphere is always fun. The menu is so varied, especially with desserts, and the chilli and coriander salmon is out of this world.

Jake from the office is always harping on about Chiquitos, we’ll have to give that salmon a go. So what made you get into blogging?

I had Instagram for a while, and uploaded photos of my food on there quite often. I got asked for months, by my friends “When are you going to do a food blog?”, so I decided to start a blog and social media channels dedicated to it. I love the little community with my followers and it’s nice to talk about coeliac disease related things that I can’t necessarily talk about with my friends and family.

Okay, we’ve got to ask. Is there a story behind the name?

YES, The Coeliac Sloth is a name my boyfriend James suggested when I was looking for a name to call my blog. I was so tired all of the time before diagnosis because of my iron deficiency, and he told me that I was a “sloth in a people’s body.” Sloths are also my absolute favourite animal.


If you are anyone you know fancy taking part in a future edition of the coeliac spotlight then get in touch over on Twitter or Facebook!

Coeliac Awareness Week & A Brief History of The Disease…

Things are looking up for us Coeliacs. Supermarkets are now stocking more gluten-free food than ever before, restaurants are starting to give us a dish or two and best of all…we’ve been given our own week! That’s right people, this week is Coeliac Awareness Week and in celebration we’re giving away 2 x £25 vouchers to spend on goodies at our brand new online store. You’ll find the competition over on our Facebook page, but before you head off we thought we’d give you a (very) brief lesson on how man’s understanding of Coeliac disease has developed over the course of history…

As hunter/gatherers, man’s diet consisted largely of fruit, nuts and meat. The human stomach had evolved over the course of 2 million years with the ability to process food antigens ingested as part of this diet; however, in 10,000 BC we saw the Neolithic revolution – when the cultivation of plants would begin. Most individuals were able to adapt to these new proteins with no problems. Others weren’t so lucky and displayed signs of intolerance – what we now know as Coeliac disease.

It wasn’t for another 8,000 years, around the 1st Century AD, that the disease would be identified and named. Yep, that’s right. 8,000 years, and even then the understanding of the disease was still pretty poor. This initial observation was made by Greek genius Aretaeus of Cappadocia, who named the disease after the Greek word for abdomen – Koelia. His rather poetic musings went as followed: “If the stomach be irretentive of the food and if it pass through undigested and crude, and nothing ascends into the body, we call such persons coeliacs”.

Now, fast forward another 18 Centuries and we get to our next major coeliac milestone. In 1888, English doctor Samuel Gee publishes the first complete modern description of the clinical picture of coeliac disease, and theorises on the importance of diet in its control. Hoorah, finally we’re getting somewhere! Let’s not get too excited. Even by this point we still had no idea of what exactly caused the disease.

It wasn’t until World War Two that things became a little clearer. Willem Karel Dicke, a leading Dutch Paediatrician, noticed something interesting when bread shortages hit the Netherlands – The condition of children suffering from Coeliac Disease actually improved! This led to Dicke investigating the matter further and a few years later he released a set of seminal papers, documenting the role that wheat and rye play in the disease. Finally! Over the next seventy years we see a number of breakthroughs that allowed us to narrow down the cause of the disease (gluten, obviously) and to also successfully diagnose a patient as Coeliac with a good degree of certainty.

So, as you’ve just read, it’s taken just over 12,000 years to get to where we are today. Luckily, it takes a little less time to cook a Too Good To Be pie…

www.toogoodtobeglutenfree.co.uk

Coeliac Spotlight – The Coeliac Sanctuary

So in case you weren’t aware, this week is Coeliac Awareness Week, and in the midst of all the madness and the vast quantities of pie we’ve been eating we managed to chat with one of our favourite coeliac bloggers, The Coeliac Sanctuary! Here’s how it went…

So, let’s start with the usual! At what age were you diagnosed with Coeliac Disease?

I was diagnosed in June 2014, so I was 25. I had gone through a rough time, falling ill around August 2013 after being made redundant but had suffered with stomach problems since my early teens but I was never checked for Coeliac although I was told I had IBS on multiple occasions.

We seem to be in the middle of a gluten free revolution right now. Have you noticed many changes in the four years since your diagnosis?

4 years may not seem long but I have seen so many changes in that time. I remember when I was first told I needed to eat gluten free and going to Sainsbury’s and there not being a huge amount of choice, mostly basic foods, bread, cereal etc. However, in the last couple of years more and more has become available in supermarkets and the products are improving, it is possible to get bread that tastes like bread now rather than something that resembles cardboard! Eating out can still be a struggle, not everywhere understands the cross contamination issues but more places are becoming more aware, it’s just a case of digging out the ones that truly understand what Coeliac is.

So true, and it’s great for us! Okay, with that in mind, give us your fave spot for a gluten free bite to eat…

I have so many, I can’t choose one! The one I go to time and time again is a local pub, The Elephant in Shavington just outside Crewe, Cheshire. The landlord is Coeliac so they are very Coeliac aware, I can’t pick a favourite dish, I’ve had pretty much everything on their menu and love it all. I also eat at Swan Lake Chinese in Haslington, again just outside Crewe, Cheshire a lot, it’s so hard to find a Chinese that does gluten free but they really understand and do most of their menu gluten free, favourite dish from there is definitely sweet and sour chicken, I love anything sweet and sour.

Wow – good gluten free Chinese food is rare! We’ll have to pay it a visit. So, if you had to cook one GF meal for a friend, what would it be?

Curry. I adore my curries so make them a lot and my favourite one is Chickpea, Sweet Potato and Spinach curry, I could live of that for months without getting bored and is always my go to when I don’t know what to have, plus it’s always a huge hit with my friends.

Well you know where we are if you ever want to drop by with a bowl. We’re big fans of your blog here at Too Good To Be HQ – what made you get in to blogging in the first place?

I was ill for a long time with one thing or another and as I was a web developer I decided to build Coeliac Sanctuary as something to keep me occupied, initially I wanted to just keep track of places I could eat at and have somewhere I could review them more for personal reference and somewhere to keep my recipes. From there I found my love of writing again and people kept visiting the website so it grew into something bigger than I ever imagined.

That’s great! It’s amazing to read a blog with so much passion and an obvious love for the gluten free community. To finish off, have you any advice for budding bloggers out there?

Write about whatever you want to write about. I’ve been asked a few times by bloggers that are starting up what they should write about, as in if it’s got “recipes” in the name should they stick to just recipes or if its about gluten free travel should they stick to just that topic. My answer is always the same though, write about what you what to write about as long as it loosely sticks to topic, at the end of the day you created a blog to write about what you want to write about, it’s just own little universe, so it should be up to you to choose what you write about.


Want to hear more from The Coeliac Sanctuary? Head over to www.coeliacsanctuary.co.uk and show them some love!


May Day Madness!

May Day Madness

Well then ladies and gents, it’s May Day and you know what that means? Oh, no neither do we. We were hoping you could tell us since nobody here at Too Good To Be HQ seems to have a clue. All we really know is that it involves a pole, Morris dancing and most importantly…food. So in celebration of this, the most ambiguous of revelries, here are three tasty gluten free recipes that have no real link to the day, aside from the fact they are being posted on a day, in may. A May Day if you will…

Gluten Free Bakewell Tart

If you’ve never tried a Bakewell Tart then it’s high time you did something about it. This British classic works a treat with clotted cream or custard…or both.

Ingredients

PASTRY

  • 100g of icing sugar
  • 50g of ground almonds
  • 250g of rice flour
  • 1 tsp xanthan gum
  • 1 pinch of salt
  • 1 vanilla pod, seeds only
  • 125g of unsalted butter
  • 2 eggs

FILLING

  • 300g of raspberry jam
  • 250g of unsalted butter
  • 250g of caster sugar
  • 2 eggs, beaten
  • 275g of ground almonds
  • 1 vanilla pod, seeds only
  • 50g of rice flour
  • 1 pinch of salt
  • 1 tbsp of Amaretto

Method

  1. Begin by making the pastry. Place all the dry ingredients in a blender and blitz until fully combined. Add the butter and blitz until the mixture resembles breadcrumbs
  2. Add the vanilla and beaten eggs and blitz until the mixture comes together to form a dough. Wrap the pastry in cling film and place in the fridge for 30–45 minutes to chill
  3. Meanwhile, make the frangipane filling. In a medium bowl, cream together the butter and sugar until light and fluffy. Gradually add the eggs, a little at a time, followed by the remaining ingredients, then whisk until smooth. Refrigerate until ready to assemble the tart
  4. Preheat the oven to 180°C/gas mark 4
  5. Roll the pastry between 2 sheets of cling film to the thickness of a £1 coin. Remove the top layer of cling film and upturn the pastry into a 10 inch tart tin. Press the pastry gently into the tin, then press the edges with your thumb to remove any excess
  6. Gently remove the cling film. Place the tart case in the freezer for 20–30 minutes, or until very firm. There is no need to blind bake gluten-free pastry
  7. Spread the raspberry jam over the base of the pastry. Dollop the frangipane filling on top of the jam and use a palette knife to smooth over the top. Scatter over the flaked almonds and bake for 40–45 minutes, or until the filling is firm and golden
  8. Leave the tart to cool slightly before turning out onto a serving plate

Gluten Free Red Velvet

The popularity of the red velvet has surged in recent years and we’re all for it! This recipe from Gluten Free Cuppa Tea is a corker…

Ingredients

FOR THE CAKE

  • 115g dairy free spread (room temp)
  • 400g granulated sugar (you can use caster sugar too here)
  • 240ml vegetable oil
  • 4 large eggs (room temp)
  • 1 1/2 tbsps vanilla extract
  • 1 tsp white vinegar
  • 240ml buttermilk (mine is homemade)
  • red gel food colouring (I use Dr Oetker Ultra Red Gel)
  • 345g gluten free plain flour
  • 1 tsp bicarbonate of soda
  • 10g cocoa powder (ensure it is dairy free)

FOR THE ICING

  • 100g dairy free spread (room temp)
  • 220g dairy free cream cheese (I use Tofutti) (room temp)
  • 500g – 600g icing sugar
  • 1/4 tsp vanilla extract

Method

  1. Prepare your tins. Grease and line 2 round cake tins with parchment paper and preheat the oven to about 175C.
  2. Make your own dairy free buttermilk. Add 1 tbsp of white wine vinegar or lemon juice to 240ml of dairy free milk. Stir thoroughly and then allow to sit for 5 minutes. The ‘buttermilk’ will then be ready to use later in the recipe.
  3. Beat your dairy free spread till smooth and creamy then add your sugar and mix together until nicely combined.
  4. Add your oil and mix for a little longer, it doesn’t look all that pretty at this stage! (I use an electric hand mixer)
  5. Separate your 4 eggs and add the yolks along with the vanilla extract to your mixture. (Do keep your eggs whites for later) Mix until combined.
  6. Mix in both your food colouring and your vinegar. I actually used 2 full tubes of Dr Oetker Red Gel in this recipe and it came out lovely and red.
  7. Sift all your dry ingredients (flour, bicarbonate of soda, cocoa powder) into a separate bowl, then add your dry ingredients gradually in sections, alternating with your dairy free homemade buttermilk. Mix to combine, but importantly, don’t over mix at this stage.
  8. Next whisk your egg whites together until they become a little foamy. Fold these into your mixture which should thicken up. (Don’t worry if the cake mixture doesn’t look perfect at this stage, I find mine doesn’t always but sorts itself out in the oven!)
  9. Pour your batter evenly between two tins. (I actually put a very small amount of mixture into a cupcake case to bake too (for half the time) just so I can crumble it for decoration on top of the cake later.
  10. Bake for about 30 minutes (Check with a skewer to make sure it is cooked through).
  11. Once cooked allow to cool completely in their tins.
  12. In the mean time, make your icing. Beat your dairy free spread until a little smooth and creamy.
  13. Add your dairy free cream cheese and vanilla extract. Mix until smooth again (you could use an electric hand mixer here).
  14. Gradually add your sifted icing sugar. I add around 150g at a time and mix it in. The cream cheese mixture will absorb all the icing sugar each time. Continue to add icing sugar until it’s the right consistency for you (the icing will firm up once you have iced the cake and refrigerated it so it doesn’t have to be really stiff).
  15. To assemble your gluten free red velvet cake, place the first cake tier on your serving plate and spread with cream cheese icing. Sandwich with your top tier.
  16. Spread the rest of the icing all over the top and sides of the cake with a palette knife until it’s completely covered. (if it looks messy at first, don’t worry mine did!! Once you chill it a little the icing holds a lot better. You can even touch up your icing if you need to)
  17. I like to finish mine by crumbling some red velvet crumbs on top. (I mentioned making a little cupcake earlier to do this – it is optional though!)

Gluten Free Blondies

For those of you who don’t know, a blondie is a brownie but…shock horror…they’re blonde! Super gooey, delicious and full of white chocolate – what’s not to love!

Ingredients

  • 150 g gluten-free flour
  • 1 tsp gluten-free baking powder
  • 1/2 tsp fine sea salt
  • 200 g soya yogurt
  • 1/2 vanilla pod, split lengthways and seeds scraped
  • 2 tbsp honey, or maple syrup
  • 250g light brown sugar
  • 200g white chocolate, roughly chopped

Method

  1. Preheat the oven to 180°C/gas 4 and line a 23cm square brownie tin with baking parchment.
  2. Sift together the flour, baking powder and sea salt into a bowl.
  3. Combine the soya yoghurt, vanilla seeds and honey in a large bowl. Add the light brown sugar and mix until well combined.
  4. Gently fold the dry ingredients into the wet ingredients, then fold in the chopped dark chocolate.
  5. Pour the batter into the prepared brownie pan and evenly spread over the pan with a spoon or spatula. Bake in the oven for 30–35 minutes, until the top of the blondie is firm and brown. Remove from the oven and let the blondie cool completely in the pan. Cut into 12 pieces and serve.